How to extend or repair your Starlink Ethernet-Cable
This how-to is for buyers of our Starlink Cable Repair & Connection Kit. We highly encourage you to purchase the kit directly from us, as many cheap manufactured connection boxes will be a hassle and may result in reduced data rates or packet loss. We exclusively use products from Metz Connect, which is a reputable brand of network equipment used in professional installations. We recommend using a connect box instead of ethernet connectors whenever possible, to keep the resistance (thus voltage drop) in the cable as low as possible.
My cable looks different than shown in the pictures!
No worries. Different cables have been used by SL in the past. The procedure is the same. You may find the shielding to look different and you might need to cut it back, but the overall procedure will be the same.
Extending your Starlink Ethernet-Cable
For extension you need two connect boxes. Just cut the original Starlink Cable somewhere in between. We recommend never cut the cable too short after a connector, because you may need multiple tries if you are new to using the LSA insertion tool. Everything else are the same steps as explained below.
Repairing your Starlink Ethernet-Cable
Preparing the tools required
- Metz Connect Cat 7 connection box
- LSA Insertion Tool (included in our Kit)
- Side Cutters
- Screw Driver (small cross)
- Knife (optional)
- Pliers (optional)
Performing the repair
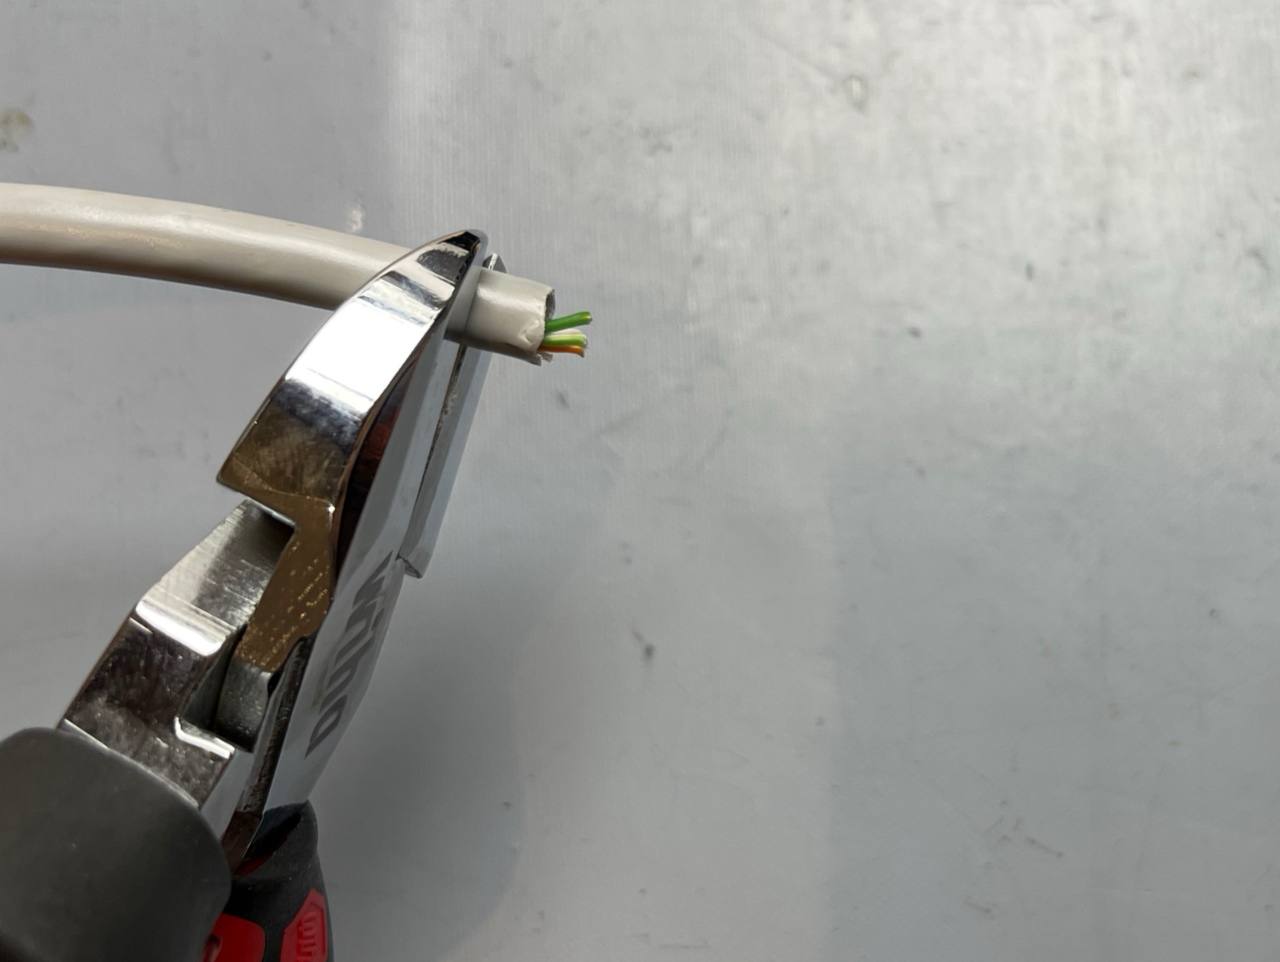
The cable needs to be prepared by cutting both ends flush. This ensures all wires are of the same length for now.
Next, hold the cable next to the box. The outer insulation needs to be stripped. You can either use a knife or the side cutter. Make sure not to damage the cable. Cutting into the shield is not something to worry about, as far as a little bit of the shielding is intact and can be wrapped around the cable later. The length doesn't need to be super precise, as we will trim the individual wires later.
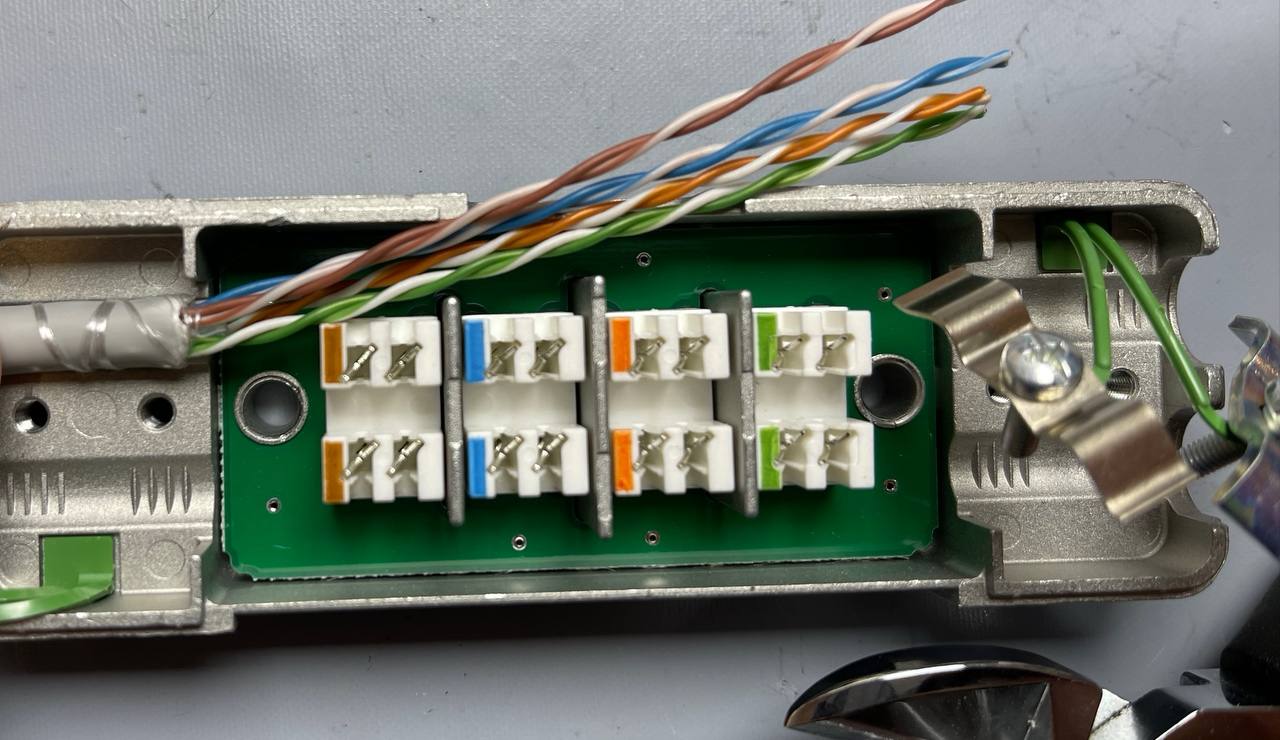
Now wrap some of the remaining shielding around the cable, as shown in the picture. And excess shielding can be cut off. Don't worry about the wires for now, we will deal with them shortly.
Tighten down the first clamp using a small cross screwdriver. Please make sure that it is tightened down onto the shielding of the cable. Also, make sure that it is so tight that the cable can not be pulled out easily.
Now start opening up the individual paired wires. Arrange them so they end up near the respective (color-coded) slot that they need to go into. For brown, you can see the fully brown color-coded wire goes next to the brown color code. The unmarked slot will contain the white-brown colored wire. When you are done, it should look like in the picture below.
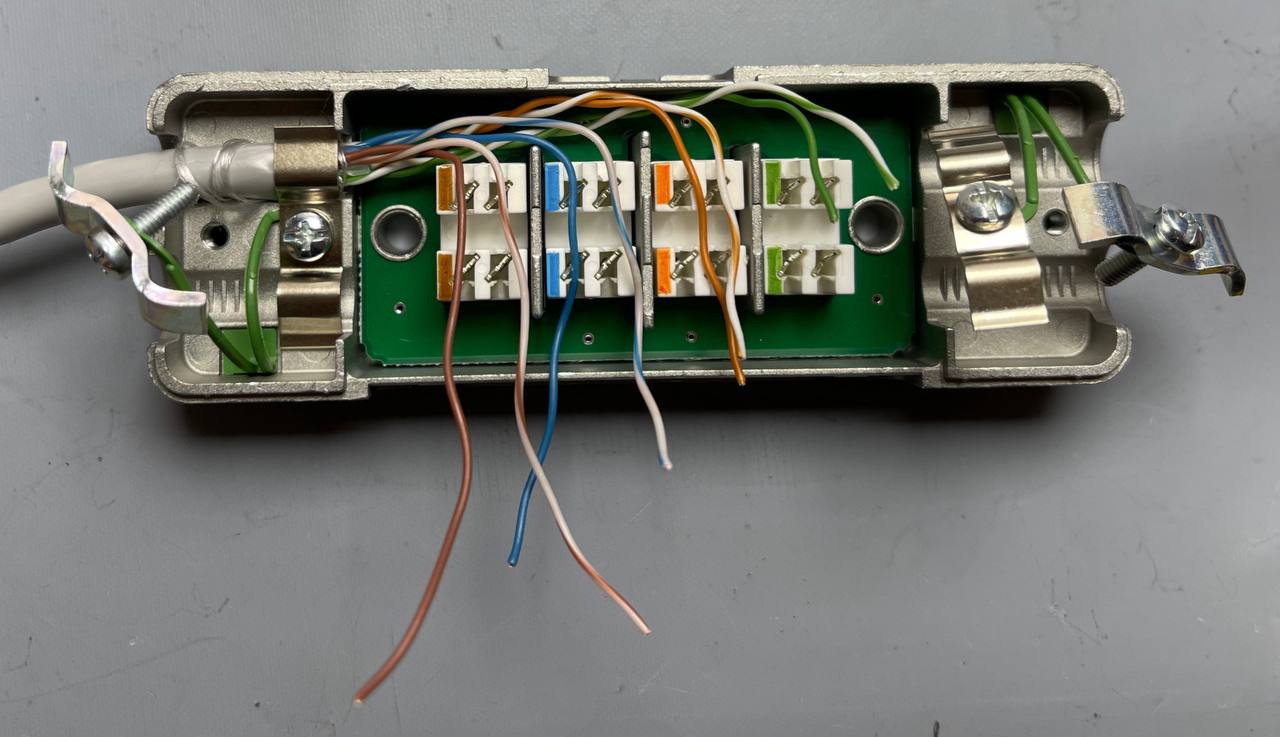
Now cut back the individual wires as shown below. This ensures that punching them down with the LSA insertion tool will work as expected.
When you are done and it looks like in the picture below, we are ready to start punching down the wires! 🎉
Watch out - don't hold the LSA tool the wrong way!
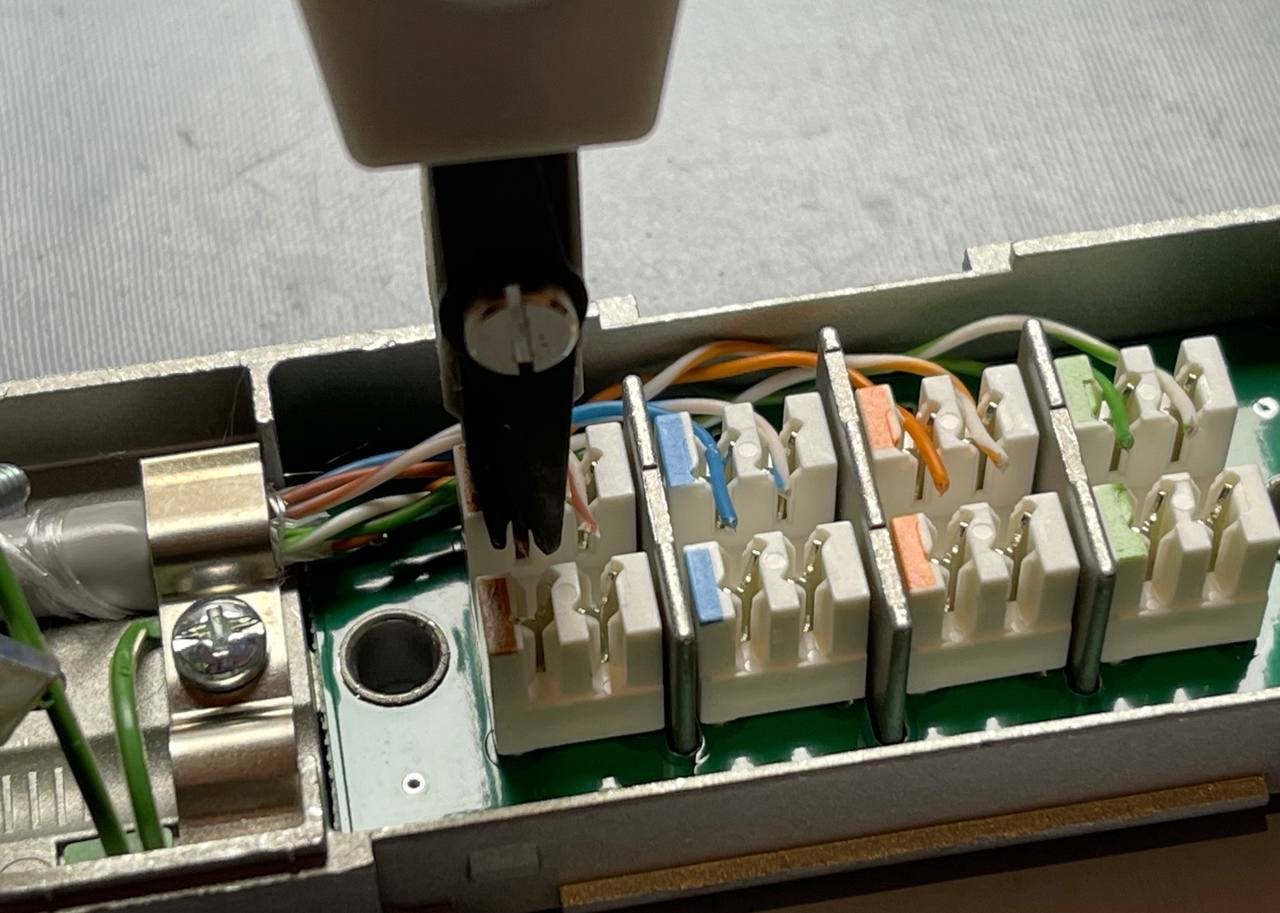
The correct orientation is the bulky part looking into the direction of the wire coming from the cable and the little scissor-looking part oriented towards the end you want to cut off after the connector.
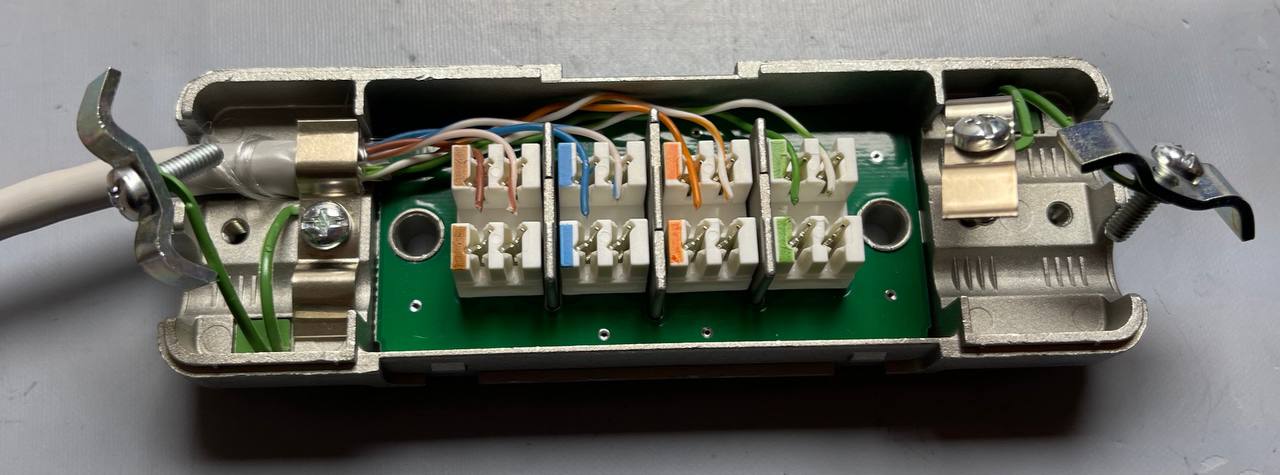
Now start punching down the individual wires. Make sure that the cable end is within the scissor part. Push down gently to slide the wire into the connector and cut off the remaining wire. You will hear a clicking noise when you push down enough.
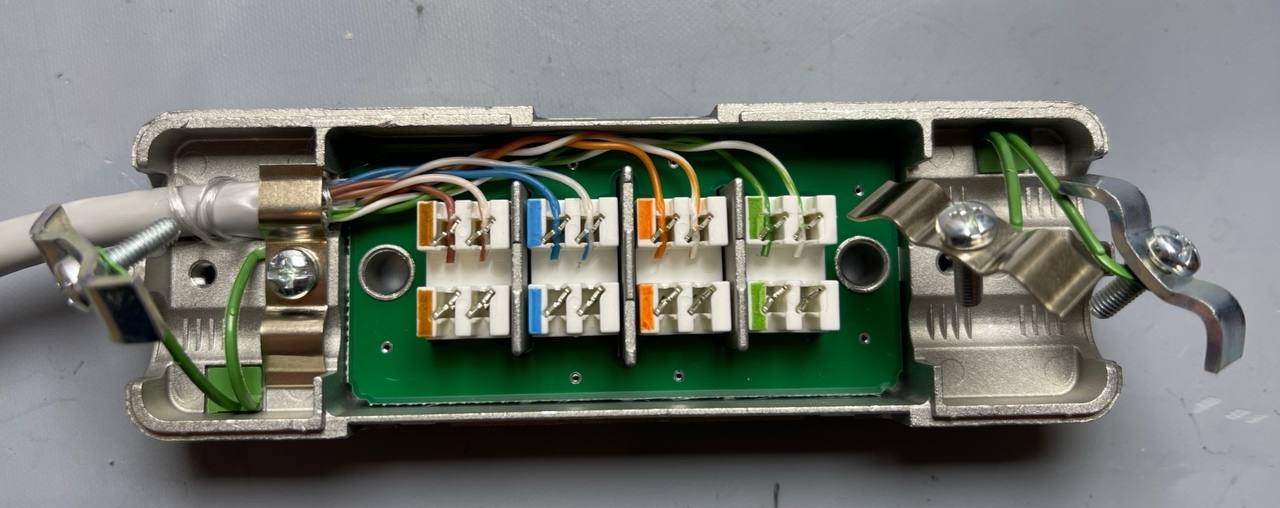
When you are done, the connector and wires should look like in the picture below. Should any wire not be cut off properly, you can simply cut it by punching down again or using a small side cutter. The most important part is that all wires are deeply pushed into the connector.
Please turn the connect box around so the cut-off wire parts can fall out.
Tighten down the remaining cable clamp on the side that we just finished punching down. Repeat the steps for the other side. Make sure the wire comes from the right lower side. The procedure is the same as the top left side. When done, please continue below.
Finish by closing the box
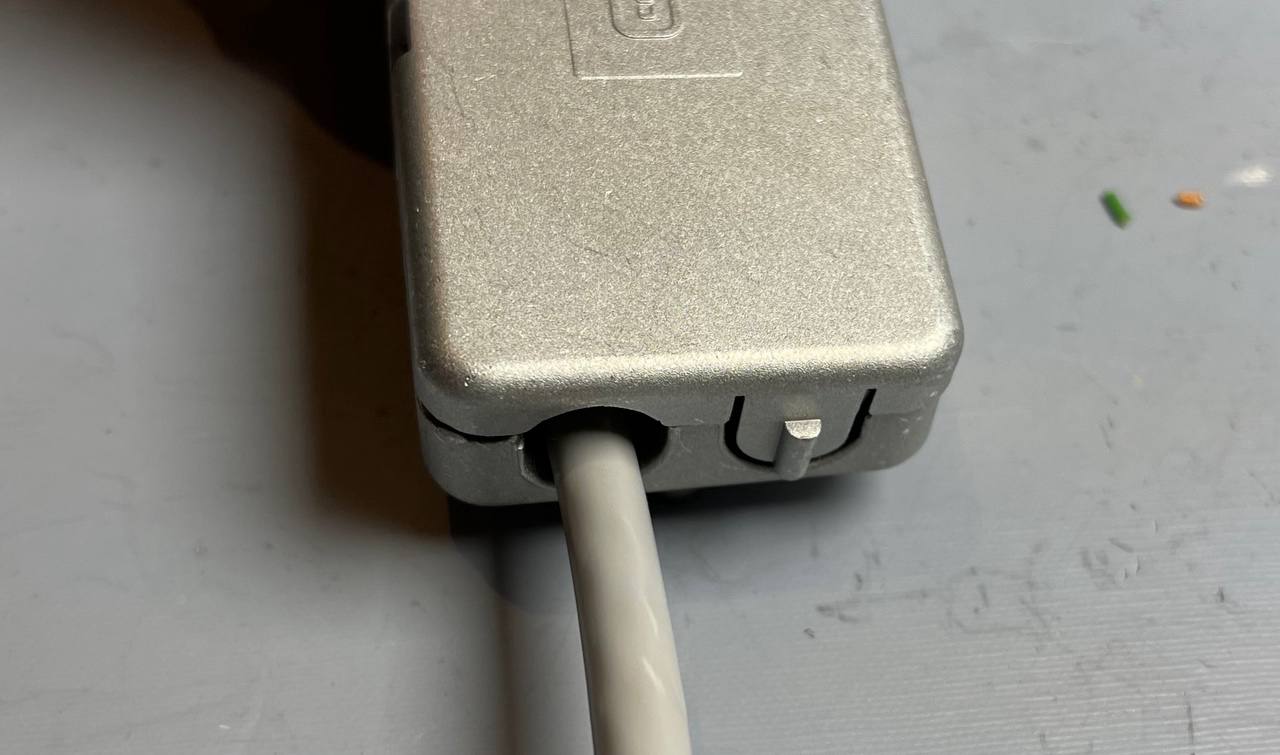
First, you need to break out one of the cover pieces. You can either do this by hand or by using pliers. Pay attention to the orientation of the box - it can only close in one way!
Push down firmly on the top cover until it locks in place.
🎉 You are done - you have successfully repaired the cable! Enjoy using your Starlink.
Something didn't work? Do you need further assistance?
No worries. We are here for you. Please send pictures and describe your problem in an email to support@linkgear.net
We are not affiliated, associated, authorized, endorsed by, or in any way officially connected with Starlink, SpaceX, or any of its subsidiaries or affiliates.








No comments to display
No comments to display