Converting a Starlink Gen 2 dish to flat ("cutting it open")
Modifications to your Starlink Dish - Warranty voided, manual not guaranteed to be correct!
This instruction is provided "as is" and without any guarantees for completeness or correctness. It is not part of the product manual and is provided for convenience. Always validate any information, do your own research and think before following the steps.
Converting your dishy can cause permanent damage (e.g. if you cut into a cable or damage the PCB during the process).
Don't have a flat mount case yet?
This manual is part of our product offering! You can buy the Flat Mount for Starlink in our shop.
Preparing Tools
The following tools are necessary: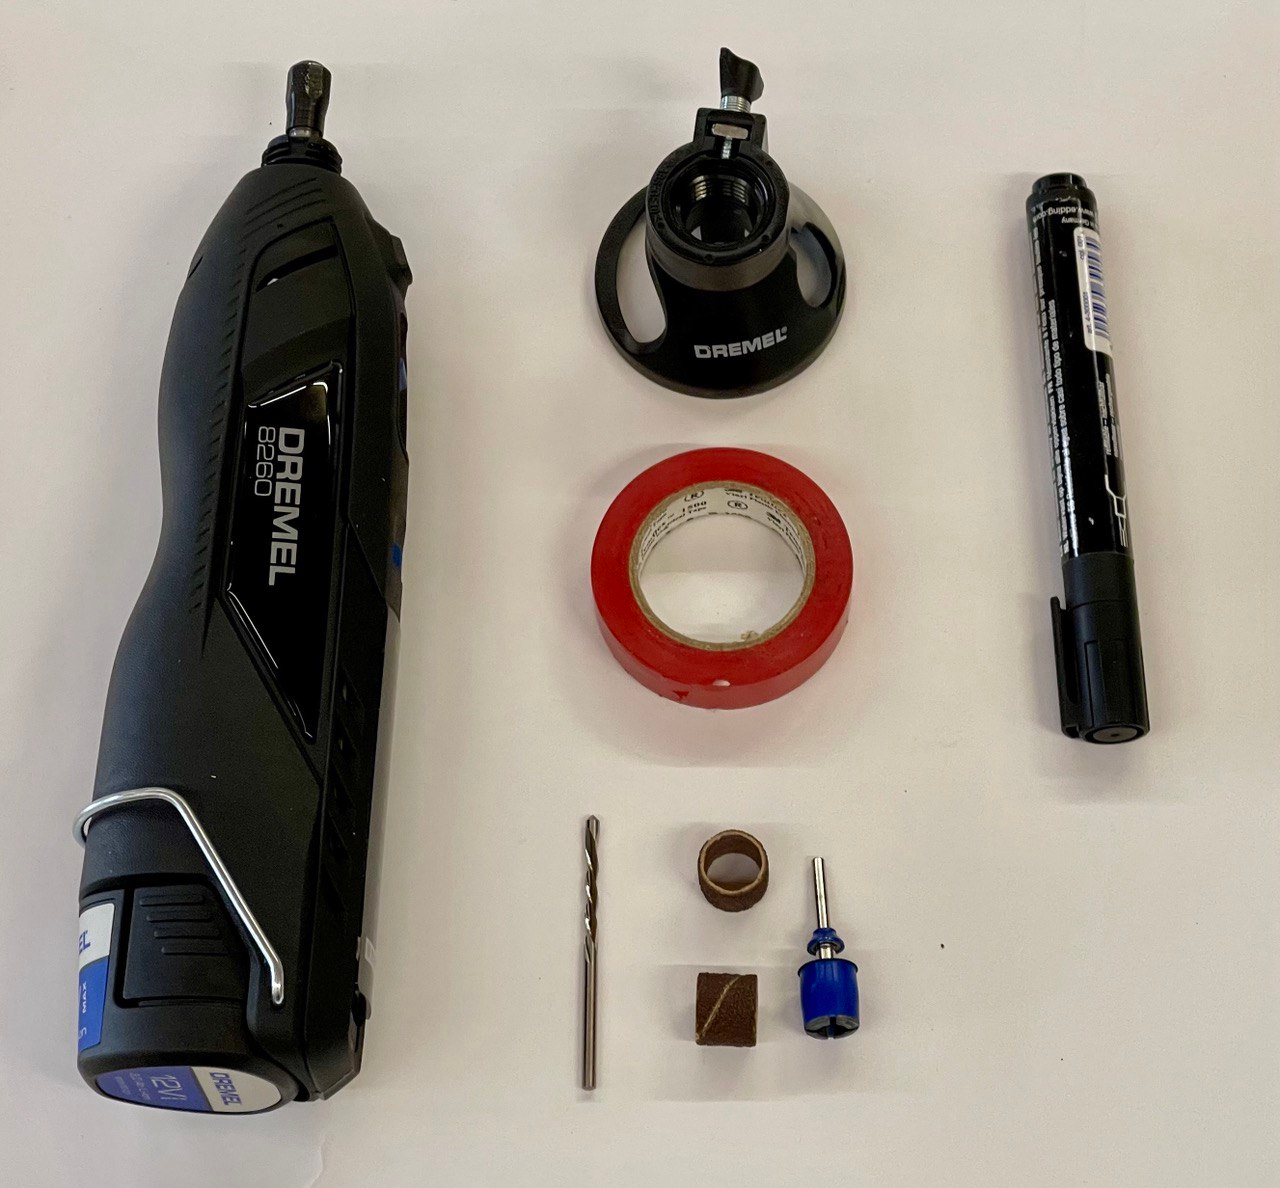
- DREMEL® Smart Multi-Tool (recommended Model 8260, any model with enough power and speed will work)
- DREMEL® Multipurpose Cutting Kit (565)
- DREMEL® Spiral Cutting Bits Multipurpose (561) Pay close attention - there are similar-looking ones with a non-cutting head!
- DREMEL® Sanding disc + sanding disc holder (see picture)
- Roll of electrical tape (or any other object between 15 and 20mm height)
- We are now including a helper tool with every shipment!
- Permanent Marker (recommended: edding 3000)
- Side cutters (not pictured)
- Knife (not pictured)
- Big flat-head screwdriver (not pictured)
- Hammer (not needed for all conversions)
Additionally, you will need
- Gorilla Clear Grip Contact Adhesive (if using another glue, make sure it is sealing and compatible with HDPE)
Get started!
Marking the cut location
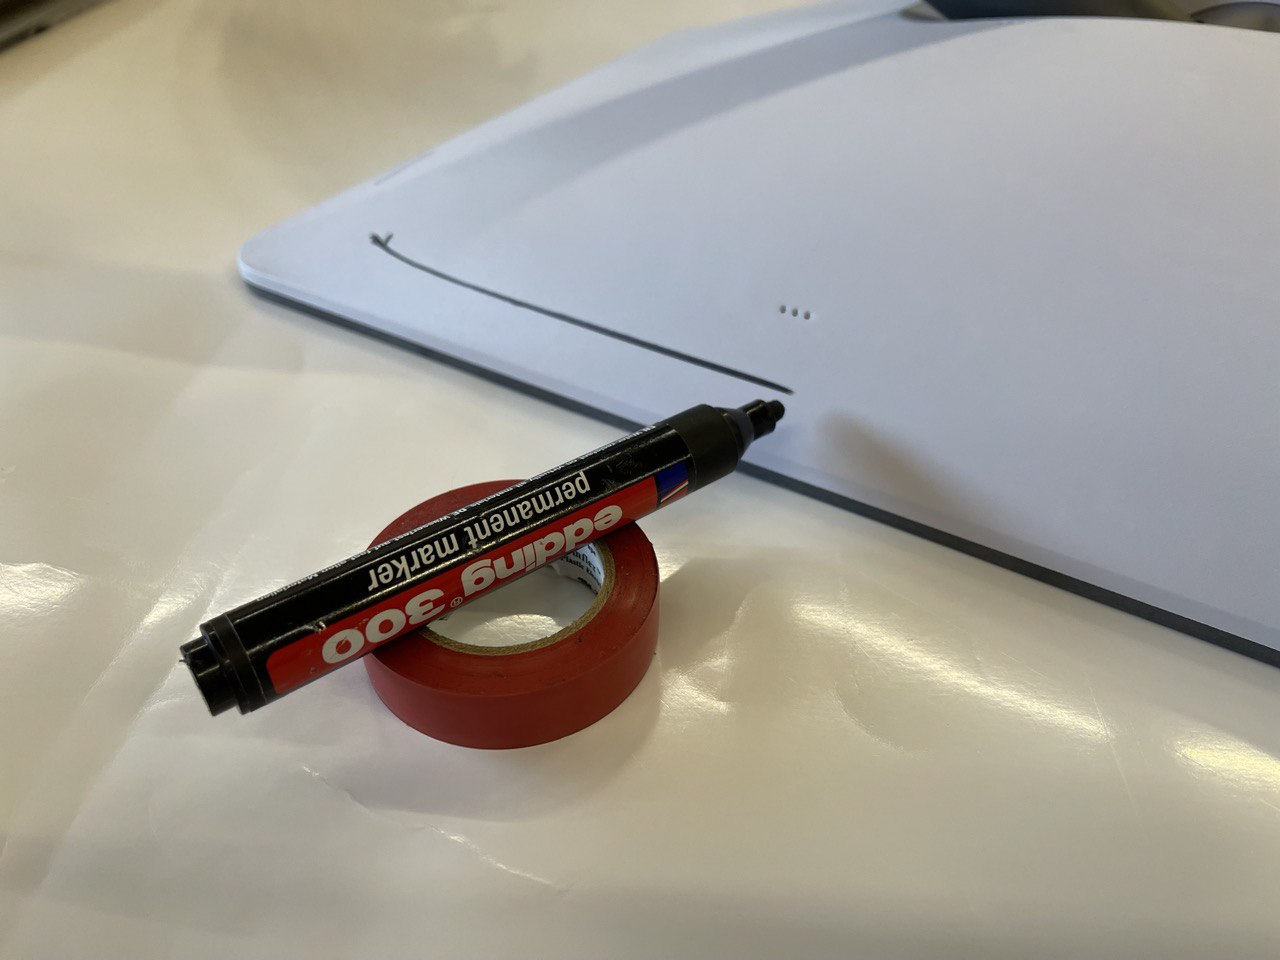
The image is out of date. While the method still works, we recommend using the little plastic tool that we ship with every flat case as well as an Edding 3000 permanent marker.
Go around the dish with the marker. You can move the marker forward, but make sure it does lay flat on the plastic holder (or roll of tape).
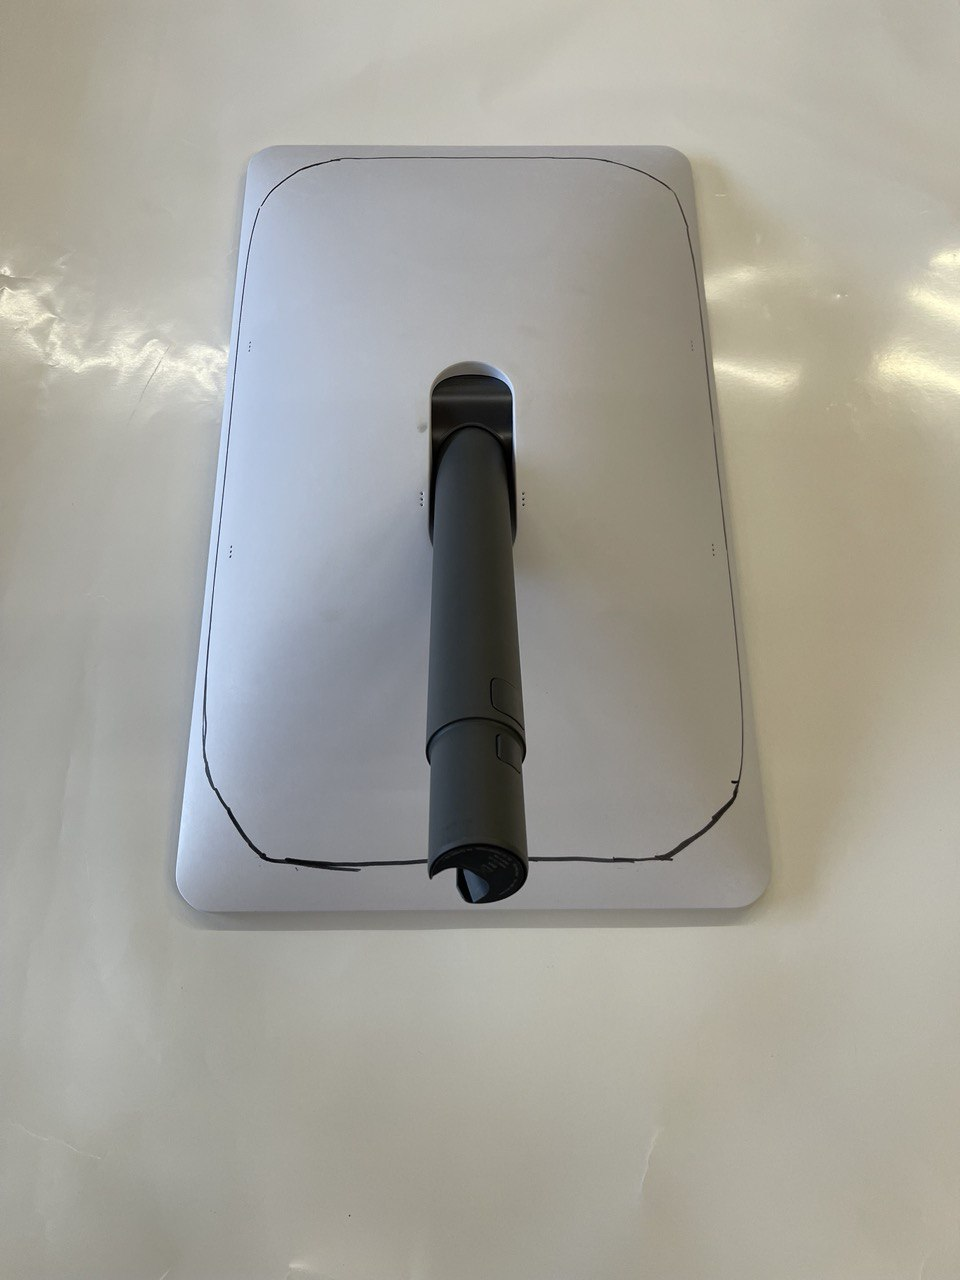
The corners are bothersome, so we recommend not spending too much time on them and instead finishing them by hand. It does not need to be perfect - just make sure you don't mark it too low. The finished result should look like this.
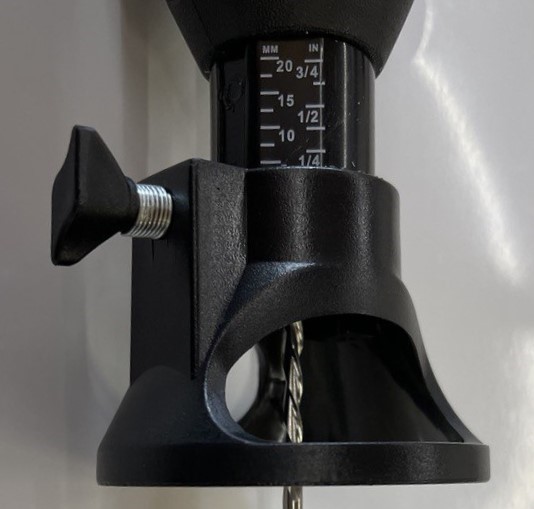
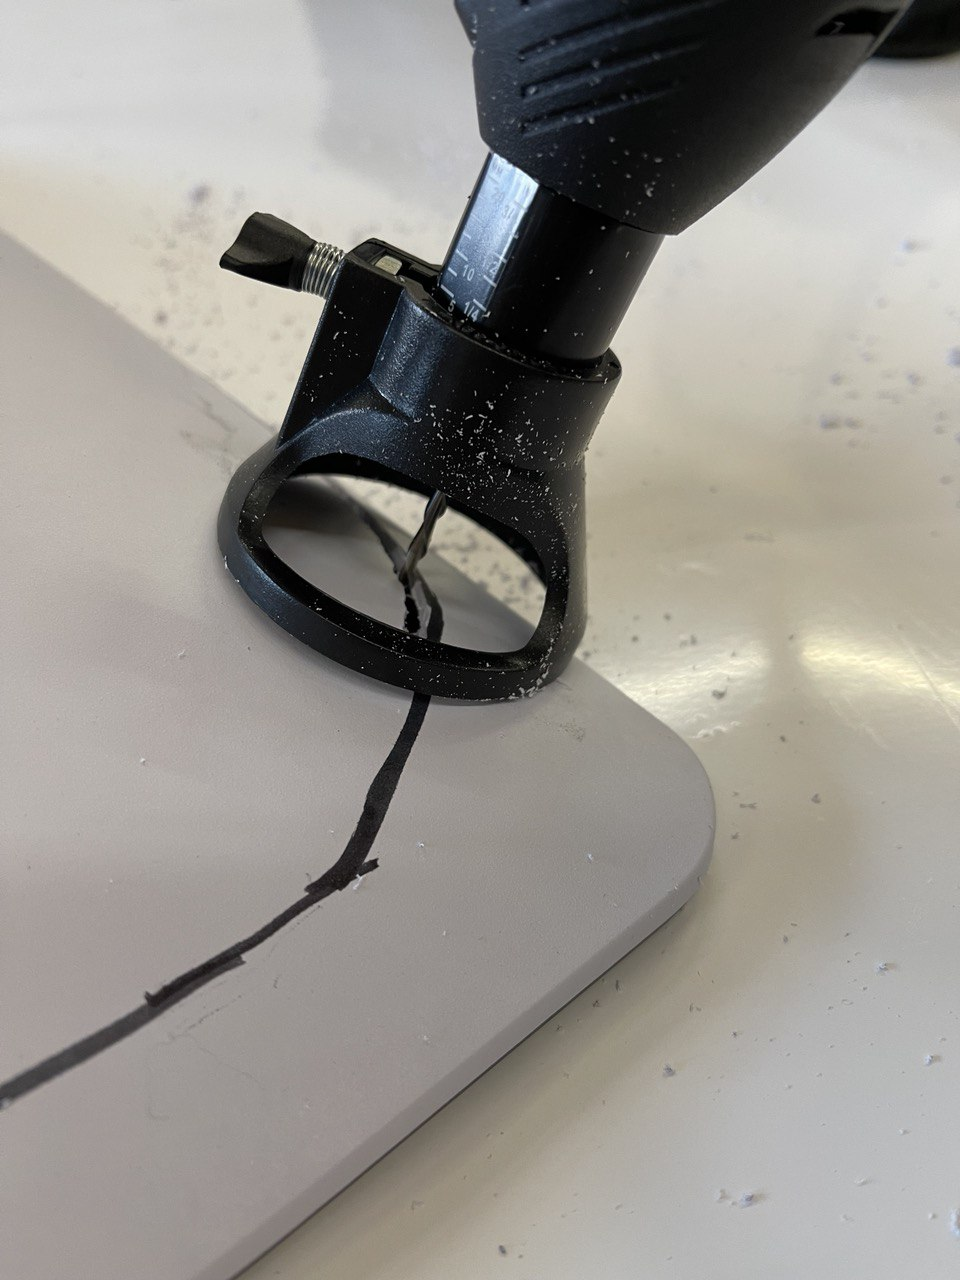
Next, we will set up the Dremel. Please make sure you are using the correct routing bit (with the flat end, not with the pointing end). You insert it FULLY into the Dremel collet until it stops. Then use the picture below to set the correct depth. Make sure nothing moves after you are done setting up, as a routing bit that goes too deep into the dish can damage your PCB!
Next, you want to turn the tool on and set the speed to the 25 setting using the dial. Then carefully insert the tool on the line. We have had great success by carefully pushing the tool through the plastics. You can try playing with the speeds a little bit to get a good result.
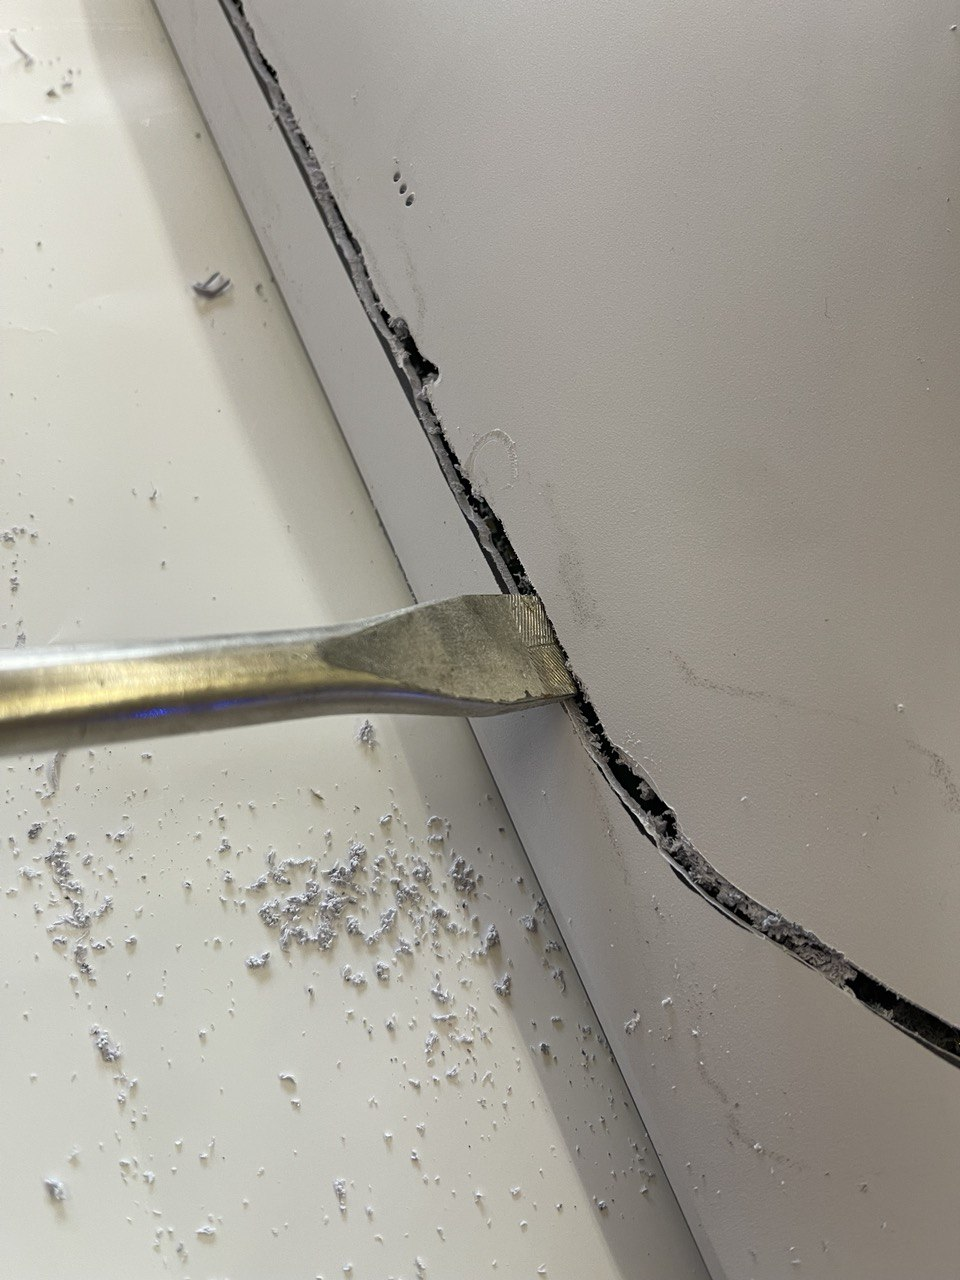
Once you cut completely around it, you will most likely feel that the feet is still stuck and do not easily come off. This is for multiple reasons, including some pieces of plastics melting and holding them together. We recommend inserting a big flat head screw driver a few mm and then carefully turning it.
Now you can carefully and slowly take the back off and put it aside. Be careful - there are still wires connected! We will disconnect the wires next. They have a small latch that you will need to press to unlock them and take the plug out of the socket.
Now you can smooth out the corners. Using the sanding attachment for the Dremel and a much slower speed, just go along the cut. The idea is to even out anything that prevents the dish from laying flat. Make sure you don't slip off and onto the PCB, as this can damage components.
There is an image missing here that shows using the sanding attachment. Sorry for the inconvenience.
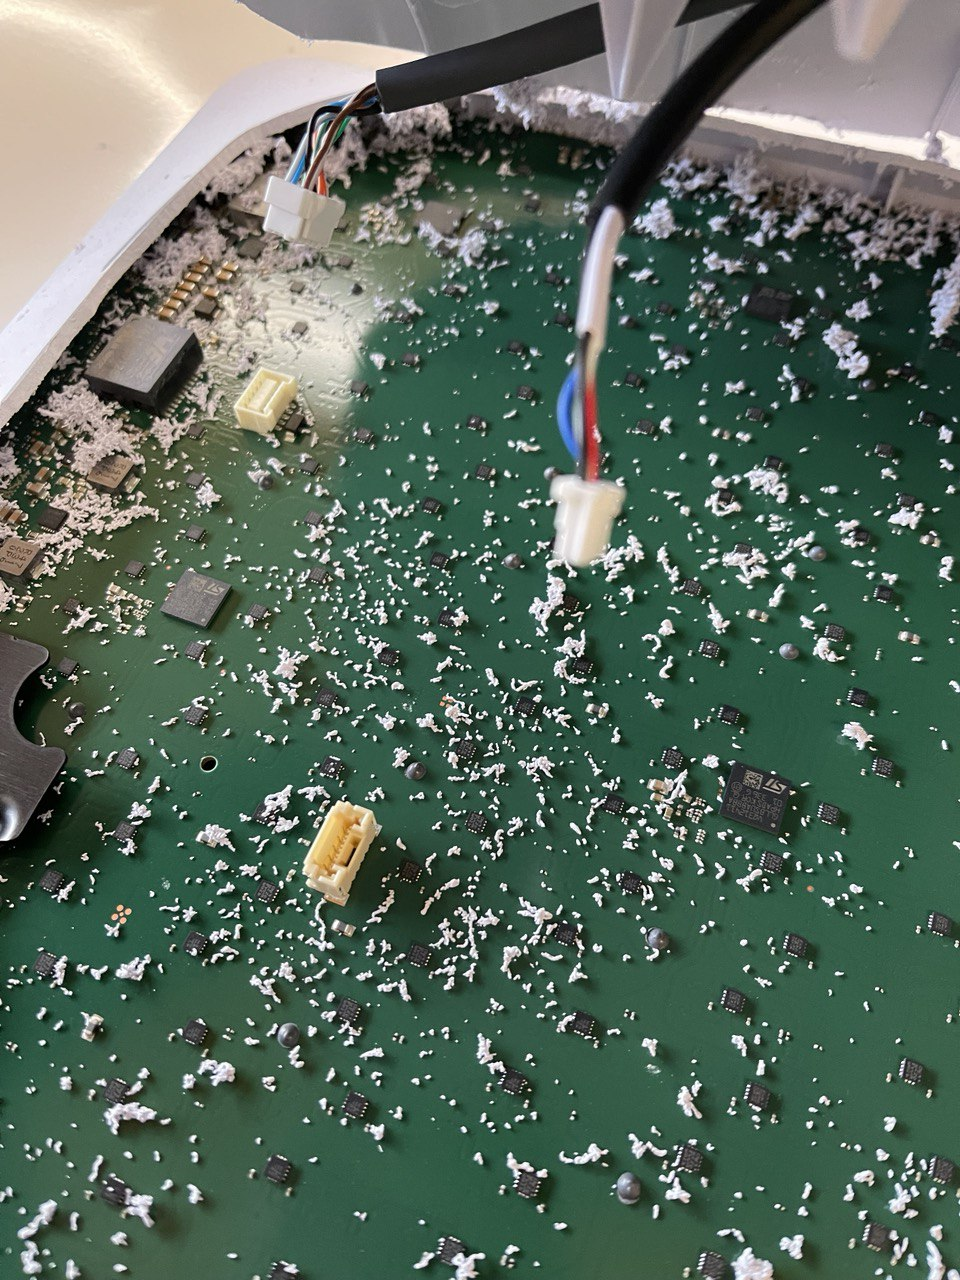
You will want to remove all the white particles within the dish as well as possible, however, please be careful. Electrostatic discharge can cause serious damage to your dishy. Avoid using a vacuum cleaner or pressured air.
Now we will cut the slot that will make sure the plug in the case fits. Please make sure you check your case! The images show the plug location on the right side! Mark out the slot as shown in the picture, for the plug on the left side you want to mark it on the other side. Also, make sure you mark it on the side where fewer electronics are on the board!
Start by carefully cutting from the top. Do not fully cut through on the bottom of the marked section (as seen in the picture below). This will be enough to remove the piece by hand. After this, you can sand the corner down VERY carefully. Do not damage the PCB!

Once this is done, you just break out the little piece using your fingers. Do not use excessive force! We recommend not sanding down this corner, as it is extremely easy to damage the board.
At this point, we recommend doing a test-fit. To make taking the dishy out of the case easier, please add a bit of tape as shown in the picture. You can easily grab the tape and then pull it up.

Dishy fits perfectly if all sections of the dish are below the top level of the case. Next we will take out the cable from the dishy stem. You open the motor housing, break the little plastic part off that holds the connector, and then pull the cable backwards through the stem.
There is an image missing here that shows opening the motor case using a screw driver and then taking the cable out. Sorry for the inconvenience.
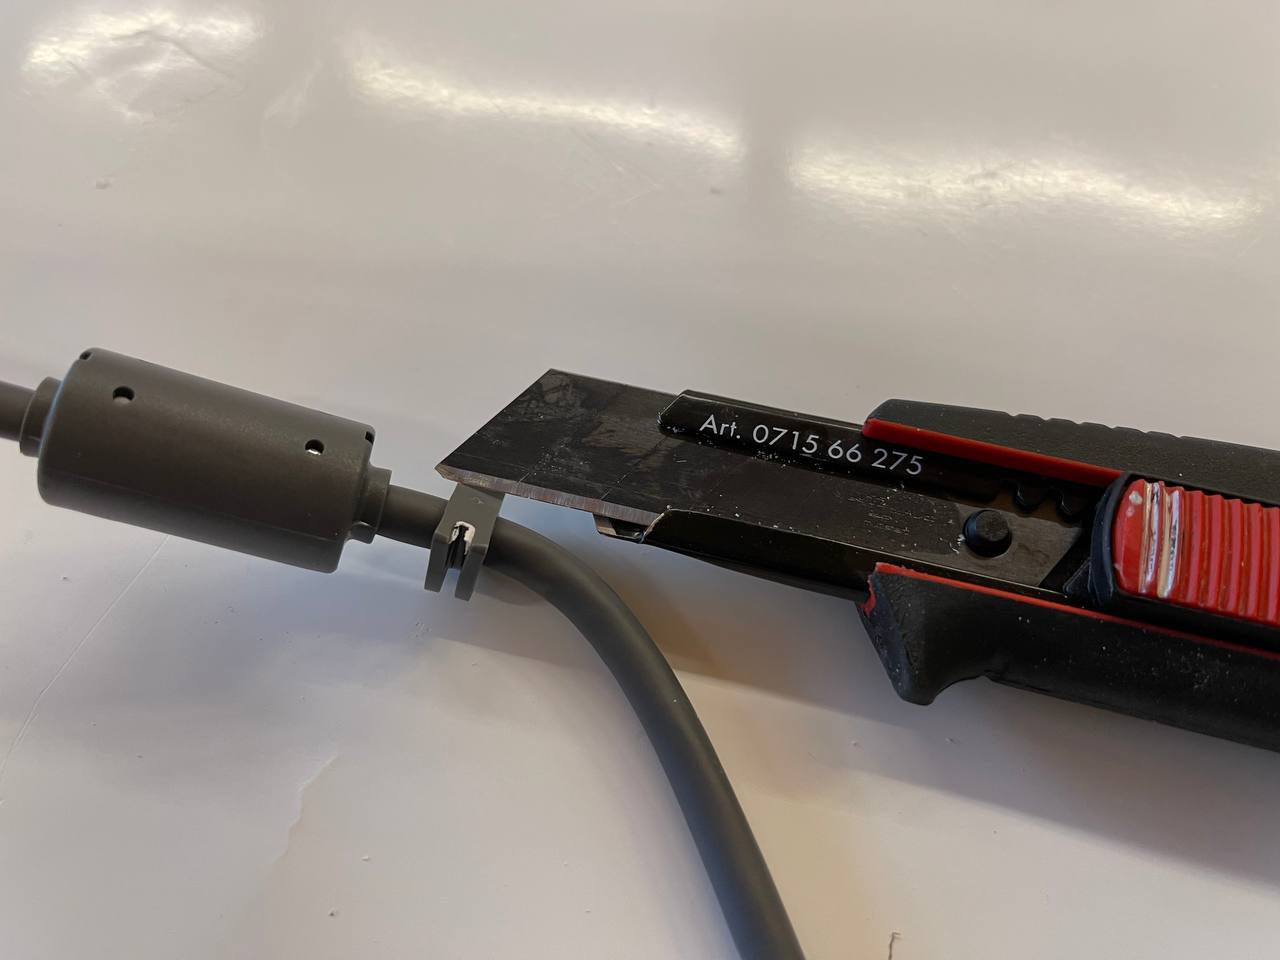
Now you need to cut off the rubber gaskets and the ferrite. Please be very careful not to damage the cable - this cable is not available as a replacement part! Cutting into the cable can permanently damage it.
Now glue in the connector. Pay close attention - the plug's top part is the part without any cutouts. First put a little bit of glue around the connector and then insert it. After this, go around the plug near the case. Especially put a good amount of glue under the connector from left and right to make sure that no water can enter. This is crucial!
Now glue the cable tie holders to the case as shown in the picture below.
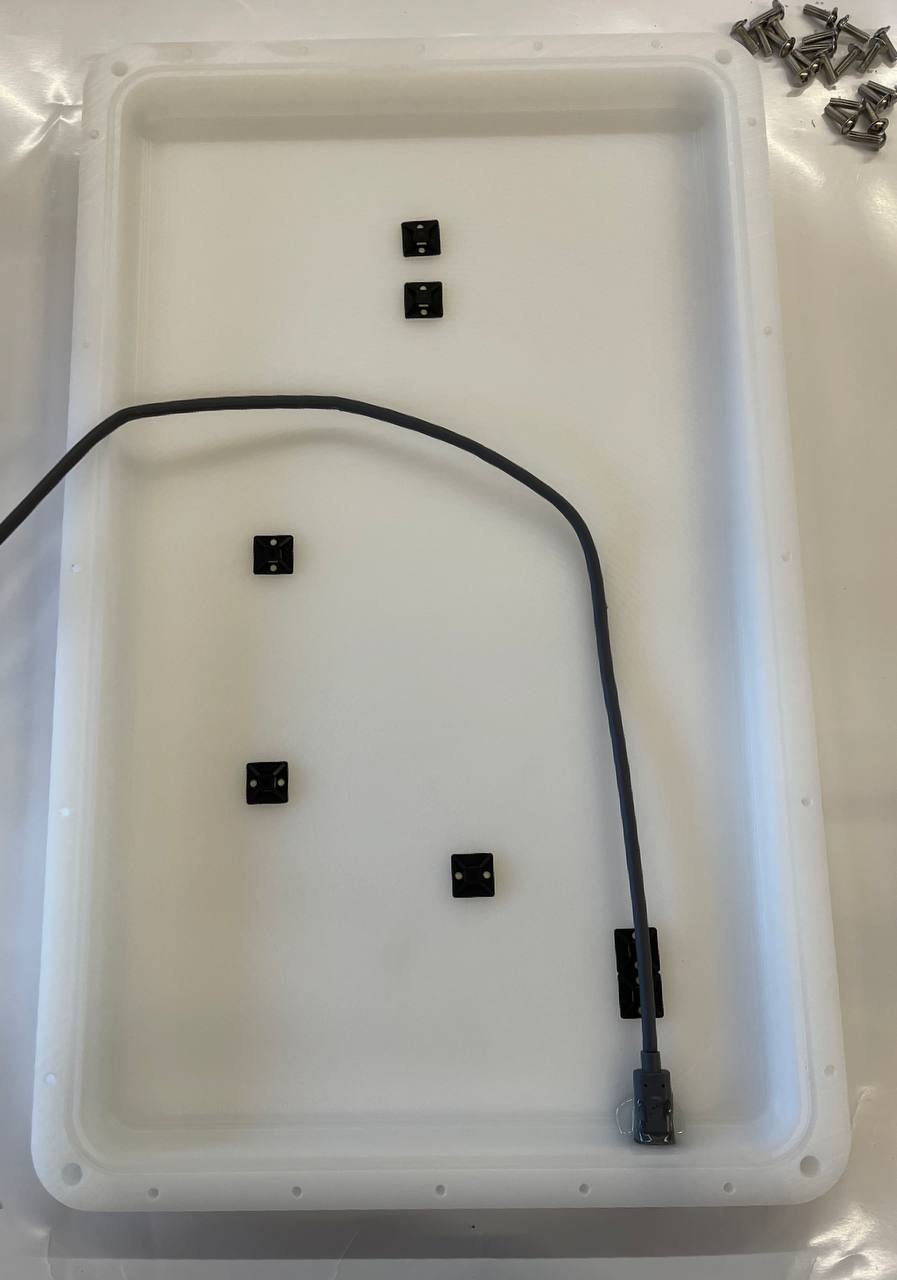
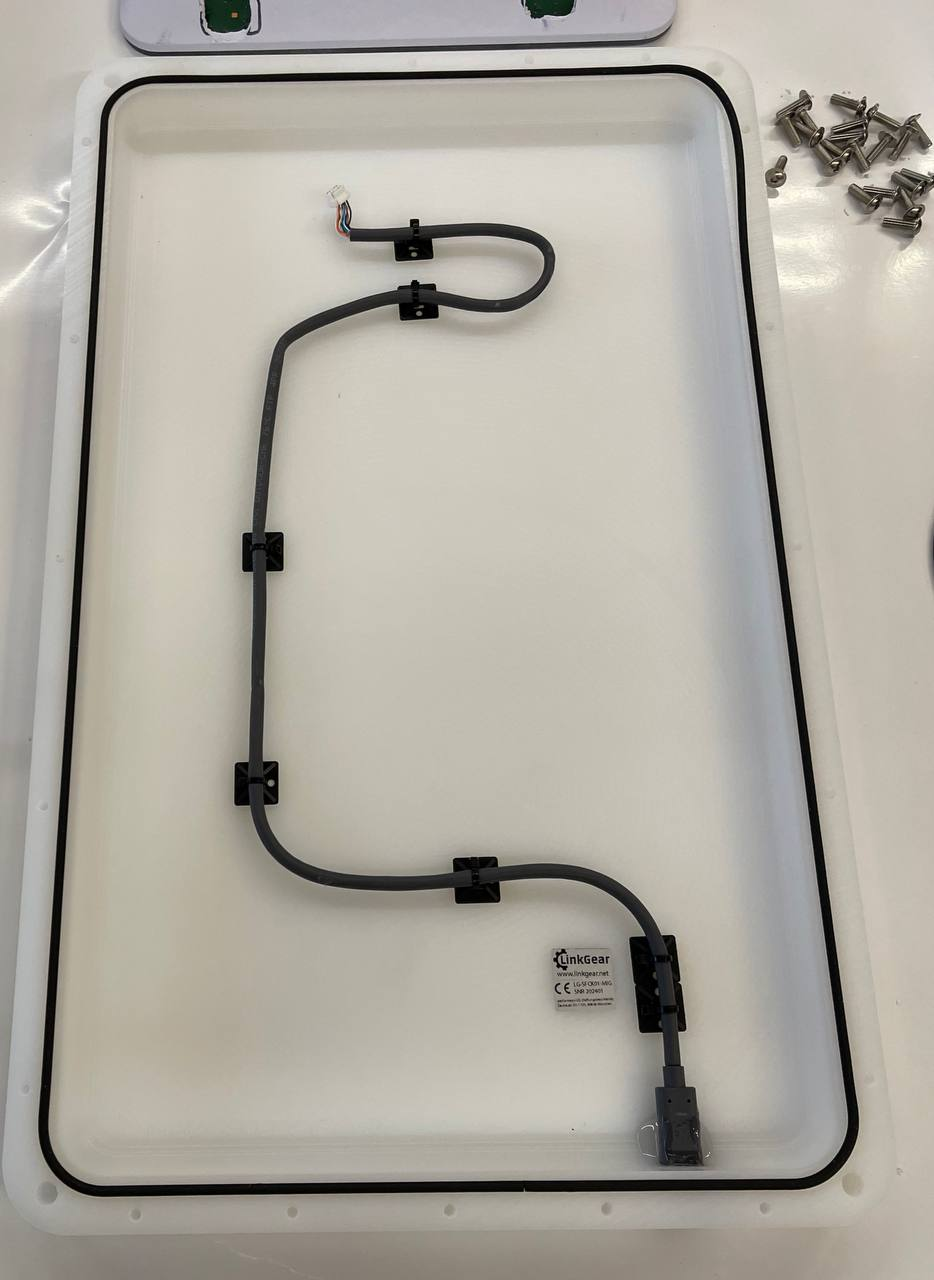
Start by adding cable ties from the connector side. Please do not overtighten them, just tight enough so the cable can not slip is enough. Also, avoid any excessive bends.
📝 Do you have any recommendations, comments or even pictures? We would love to see them. Please send them to support [@] linkgear dot net.
No Comments